docker搭建elasticsearch并使用python连接
发布于
docker搭建elasticsearch并使用python连接
搭建
创建一个docker网络
docker network create elastic然后拉elasticsearch 的docker 容器
docker pull docker.elastic.co/elasticsearch/elasticsearch:8.10.2运行容器
docker run --name es01 --net elastic -p 9200:9200 -it -m 1GB docker.elastic.co/elasticsearch/elasticsearch:8.10.2如果遇到报错Elasticsearch exited unexpectedly, with exit code 78 ,在终端运行sudo sysctl -w vm.max_map_count=262144然后删掉刚才的镜像,重新运行容器。(这个设置重启后会失效,可以在/etc/sysctl.conf以设置使其永久有效。)
成功运行终端会弹出很多信息,然后最后会给出密码等,如下
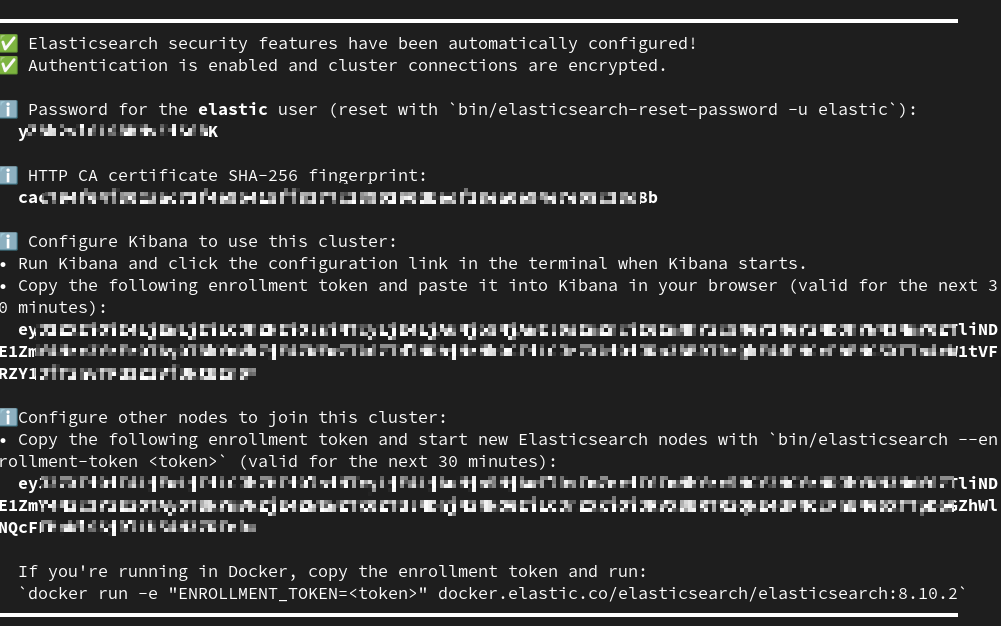
记得保存密码,可以将密码加到环境变量里export ELASTIC_PASSWORD="your_password",他只会弹出一次。如果忘了也可以重置密码
docker exec -it es01 /usr/share/elasticsearch/bin/elasticsearch-reset-password -u elastic
docker exec -it es01 /usr/share/elasticsearch/bin/elasticsearch-create-enrollment-token -s kibana
验证是否正常运行
把证书从容器中复制一份
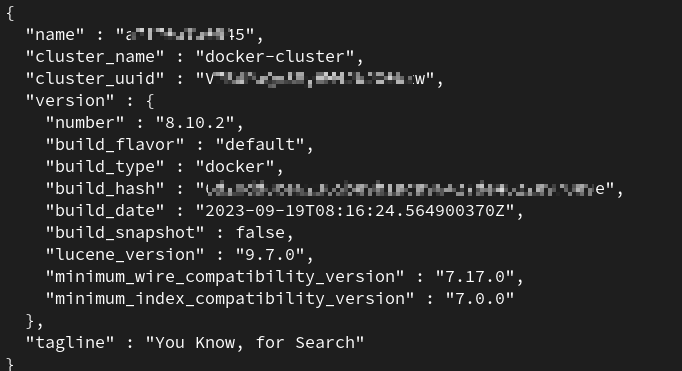
docker cp es01:/usr/share/elasticsearch/config/certs/http_ca.crt .然后运行命令查看restful api是否正常运行
curl --cacert http_ca.crt -u elastic:$ELASTIC_PASSWORD https://localhost:9200如果看到类似下图的信息就成功了
python连接
运行下面的代码,password改成你自己的代码。
from elasticsearch import AsyncElasticsearch
import ssl
import asyncio

ssl_context = ssl.create_default_context(cafile='info/http_ca.crt')
es = AsyncElasticsearch(
    ['https://localhost:9200'],
    http_auth=('elastic', 'password'),
    scheme="https",
    ssl_context=ssl_context
)

async def main():
    info = await es.info()
    print(info)
    await es.close()

# 运行主函数
asyncio.run(main())
看到类似下面的输出代表运行成功