ControlNet训练和微调自己数据集
文字生成图片
训练和微调在这里是一件事情,我们下面就统一用训练这个词。
2024.1.20 更新 controlnet 发布快一年了,diffusers 已经有了很完整的生态,建议直接使用第二种方式 diffusers 进行训练+推理
从官方仓库训练
官方教程 https://github.com/lllyasviel/ControlNet/blob/main/docs/train.md
环境配置
先看一下有没有显卡
nvidia-smi首先下载整个仓库
git clone https://github.com/lllyasviel/ControlNet.git然后创建 conda 虚拟环境(选做,只要你能配好环境)
conda env create -f environment.yaml
conda activate control
接下来需要下载 stable diffusion 和训练集,因为我们是对 stable diffusion 模型做微调。
下载 sd1.5 到,models 目录
cd ./models
wget https://huggingface.co/runwayml/stable-diffusion-v1-5/resolve/main/v1-5-pruned.ckpt
下载训练数据集到 training 文件夹
mkdir training
cd ./training
wget https://huggingface.co/lllyasviel/ControlNet/resolve/main/training/fill50k.zip
解压数据集
unzip fill50k.zip当然这个数据集非常大,我们也可以选择小一点的
wget https://huggingface.co/datasets/huggingface/documentation-images/resolve/main/diffusers/controlnet_training/conditioning_image_1.png

wget https://huggingface.co/datasets/huggingface/documentation-images/resolve/main/diffusers/controlnet_training/conditioning_image_2.png
然后将 conditioning_image_1.png 改名 0.png 放到./source 目录下,conditioning_image_2.png 改名放到./target 目录下
mv conditioning_image_1.png 0.png
mv 0.png ./source

mv conditioning_image_2.png 0.png
mv 0.png ./target然后创建一个prompt.json 的文件写入
{
	"source": "source/0.png",
	"target": "target/0.png",
	"prompt": "pale golden rod circle with old lace background"
}
无论是哪种方式,最后的文件结构是这样的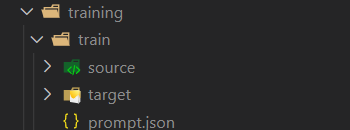
训练
首先调一下tutorial_train.py 里的 batch_size,训练过程中如果出现 out of memory 的情况可以调小。
接下来运行 tutorial_train.py,闭上眼睛等待训练完成即可
python tutorial_train.py如果是完整数据集,大概 6 个小时一个 epoch,如果是单张图片会很快。
当然,为了不要出现网不好 ssh 断掉导致训练终端,我们可以使用 screne
screen -S train
conda activate control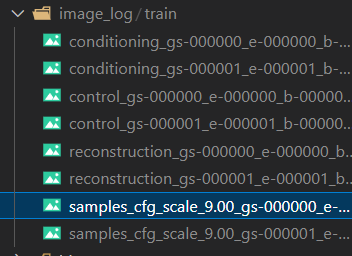
python tutorial_train.py训练出的结果可以在image_log 中看到
推理
原作者没有给出怎么推理代码的方式,但是有人给出了一个脚本 GitHub 将你训练出来的模型转换成 diffusers,接着你就可以中下面 diffusers 的方式推理模型了。
踩坑解决
out of memory(oom)
首先开启save_memory模式,将config.py 中 False 改为 True
同时调低 batch_size
No operator found for memory_efficient_attention_backward
卸载 xformers
pip uninstall xformersTypeError: on_train_batch_start() missing 1 required positional argument: ‘dataloader_idx’
这个比较坑,是论文代码有问题,改一下源码就好
- ControlNet/ldm/models/diffusion/ddpm.py 文件 591 行
def on_train_batch_start(self, batch, batch_idx, dataloader_idx):删除 dataloader_idx,改为
def on_train_batch_start(self, batch, batch_idx):- ControlNet/cldm/logger.py 文件 74 行
def on_train_batch_end(self, trainer, pl_module, outputs, batch, batch_idx, dataloader_idx):删除 dataloader_idx,改为
def on_train_batch_end(self, trainer, pl_module, outputs, batch, batch_idx):Diffusers 训练
Diffusers 是一个 huggingface 推出的扩散模型的封装库,同时也对 ControlNet 做了封装,https://github.com/huggingface/diffusers/tree/main/examples/controlnet
训练
代码跑起来其实也非常简单,首先下载 diffusers 整个仓库,然后安装依赖
git clone https://github.com/huggingface/diffusers
cd diffusers
pip install -r requirements.txt
你可能会发现这样的报错

  WARNING: The scripts accelerate, accelerate-config and accelerate-launch are installed in '/home/ubuntu/.local/bin' which is not on PATH.
  Consider adding this directory to PATH or, if you prefer to suppress this warning, use --no-warn-script-location.
  WARNING: The script transformers-cli is installed in '/home/ubuntu/.local/bin' which is not on PATH.
  Consider adding this directory to PATH or, if you prefer to suppress this warning, use --no-warn-script-location.
  WARNING: The script ftfy is installed in '/home/ubuntu/.local/bin' which is not on PATH.
  Consider adding this directory to PATH or, if you prefer to suppress this warning, use --no-warn-script-location.
  WARNING: The script tensorboard is installed in '/home/ubuntu/.local/bin' which is not on PATH.
  Consider adding this directory to PATH or, if you prefer to suppress this warning, use --no-warn-script-location.
  WARNING: The script datasets-cli is installed in '/home/ubuntu/.local/bin' which is not on PATH.
  Consider adding this directory to PATH or, if you prefer to suppress this warning, use --no-warn-script-location.
别慌,依赖已经下载成功了,只是下载到了一个不在 PATH 的路径,接下来如果要使用这些被提到的库就需要指明路径,例如下面我们要使用 accelerate,正常的用法是
accelerate 你要执行的东西我们只需要改成
/home/ubuntu/.local/bin/accelerate 你要执行的东西接下来运行 tutorial_train
accelerate config全部选 NO 就好,如果你有多卡什么的可以参考官方文档
我们需要测试数据集
wget https://huggingface.co/datasets/huggingface/documentation-images/resolve/main/diffusers/controlnet_training/conditioning_image_1.png

wget https://huggingface.co/datasets/huggingface/documentation-images/resolve/main/diffusers/controlnet_training/conditioning_image_2.png
接着运行,设置基础模型和模型输出目录
export OUTPUT_DIR="./out_models"
export MODEL_DIR="runwayml/stable-diffusion-v1-5"
运行代码,这里 epoch=1,steps=1
/home/ubuntu/.local/bin/accelerate launch train_controlnet.py --pretrained_model_name_or_path=$MODEL_DIR --output_dir=$OUTPUT_DIR --dataset_name=fusing/fill50k --resolution=512 --learning_rate=1e-5 --validation_image "./conditioning_image_1.png" "./conditioning_image_2.png" --validation_prompt "red circle with blue background" "cyan circle with brown floral background" --train_batch_size=4 --num_train_epochs=1 --max_train_steps=1推理
新建一个文件inference.py
from diffusers import StableDiffusionControlNetPipeline, ControlNetModel, UniPCMultistepScheduler
from diffusers.utils import load_image
import torch

base_model_path = "path to model"
controlnet_path = "path to controlnet"

controlnet = ControlNetModel.from_pretrained(controlnet_path, torch_dtype=torch.float16)
pipe = StableDiffusionControlNetPipeline.from_pretrained(
    base_model_path, controlnet=controlnet, torch_dtype=torch.float16
)

# speed up diffusion process with faster scheduler and memory optimization
pipe.scheduler = UniPCMultistepScheduler.from_config(pipe.scheduler.config)
# remove following line if xformers is not installed
pipe.enable_xformers_memory_efficient_attention()

pipe.enable_model_cpu_offload()

control_image = load_image("./conditioning_image_1.png")
prompt = "pale golden rod circle with old lace background"

# generate image
generator = torch.manual_seed(0)
image = pipe(
     prompt, num_inference_steps=20, generator=generator, image=control_image
).images[0]

image.save("./output.png")
这里的 base_model_path 和 controlnet_path 改成之前设置的 MODEL_DIR 和 OUTPUT_DIR(注意顺序)
接下来运行就可
python inference.py结果会被保存到output.png
踩坑解决
WARNING: The scripts accelerate, accelerate-config and accelerate-launch are installed in ‘/home/ubuntu/.local/bin’ which is not on PATH.Consider adding this directory to PATH or, if you prefer to suppress this warning, use —no-warn-script-location.
  WARNING: The scripts accelerate, accelerate-config and accelerate-launch are installed in '/home/ubuntu/.local/bin' which is not on PATH.
  Consider adding this directory to PATH or, if you prefer to suppress this warning, use --no-warn-script-location.
  WARNING: The script transformers-cli is installed in '/home/ubuntu/.local/bin' which is not on PATH.
  Consider adding this directory to PATH or, if you prefer to suppress this warning, use --no-warn-script-location.
  WARNING: The script ftfy is installed in '/home/ubuntu/.local/bin' which is not on PATH.
  Consider adding this directory to PATH or, if you prefer to suppress this warning, use --no-warn-script-location.
  WARNING: The script tensorboard is installed in '/home/ubuntu/.local/bin' which is not on PATH.
  Consider adding this directory to PATH or, if you prefer to suppress this warning, use --no-warn-script-location.
  WARNING: The script datasets-cli is installed in '/home/ubuntu/.local/bin' which is not on PATH.
  Consider adding this directory to PATH or, if you prefer to suppress this warning, use --no-warn-script-location.
类似的问题,这里的依赖已经安装成功了,只是被安装到了未被添加到 PATH 的目录,接下来运行的时候只需要指明目录即可。例如下面我们要使用 accelerate,正常的用法是
accelerate 你要执行的东西我们只需要改成
/home/ubuntu/.local/bin/accelerate 你要执行的东西